No doubt when talking of the latest Windows Operating System (OS), Windows 11 is the one that will come to our mind. Did you know that with all the great features that come with this OS, it doesn't support some PCs (Personal Computers)
Computers with lower configurations cannot have Windows 11 installed on them. Research shows that if your PC doesn't meet certain requirements this OS cannot be installed on them. For instance, if your PC's Processor is not up to 7th generation, be it Intel Corei3, Corei5 or Corei7 Windows 11cannot be loaded on them. There is also certain amount of RAM and other requirements that your PC needs to possess before Windows 11 can run on it.
However, the good news here is that with all these hurdles and restrictions, there is a way to 'ByPass' them. And that's what we are going be discussing in this article.
Let's go.
Benefits of Using Windows 11 on a Lower Configuration PC
Windows 11 is the latest operating system from Microsoft that has a lot of new features. Some of the benefits of using Windows 11 include:
1. Advanced security: Windows 11 has improved security features that make it harder for hackers to access your computer.
2. Great performance: Windows 11 has been designed to improve performance and responsiveness on your computer.
3. Improved accessibility: Windows 11 has been designed to be more accessible and easier to use for people with disabilities.
4. Easy navigation: Windows 11 has improved navigation features that make it easier to find what you are looking for on your computer.
5. New and Beautiful design: Windows 11 has a new design that is modern and sleek.
How to Install Windows 11 on a Low Configuration PC
Installing Windows 11 comes in different ways depending on the type of bootable drive you choose to use.
However, if you are using a flash drive for instance, insert it into the usb port of the system you want to install it on. Start the PC and press any key that leads you to the 'boot menu' of your system (it may be: F9, F12, F8, DEL Key) on your keyboard. Then select the appropriate bootable device e.g. USB Device.
See the diagram below:
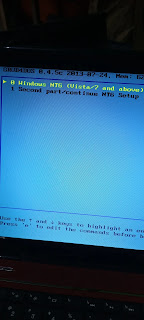
Next step is to choose the OS you want to install:
The next phase is to select the 'windows 11 64bit' from the list:
After selecting this option, allow the process to load and click on 'Next' then followed by clicking on 'Install now' as shown in the picture below.
Then now comes to where the main work is; how to bypass the low configuration that will hinder Windows 11 from installing on your PC.
The next message you will see is "This PC can't run Windows 11". See the diagram below.
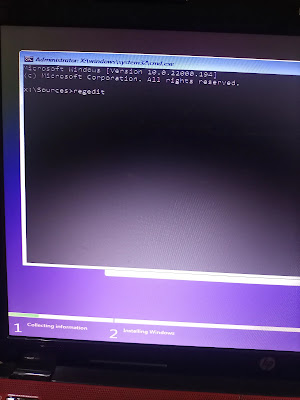
Once you see this message above, the next thing to do is to press the 'Shift + F10' keys on your keyboard simultaneously. The next command prompt screen will appear, type 'regedit' and press 'Enter' on your keyboard. See the picture below:
Then the 'Registry Editor' screen that appear, click on the drop down folder labeled 'HKEY_LOCAL_MACHINE', select the folder 'SYSTEM' and go to the 'SETUP' folder and right click choose 'New' then navigate to 'Key' and type 'LabConfig' to create a new folder. Check the diagram below:
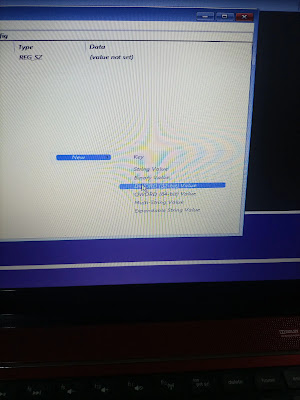
After this step, the next step is to right click on an empty space, choose 'New' then scroll down to select 'DWORD (32bit) Value'.
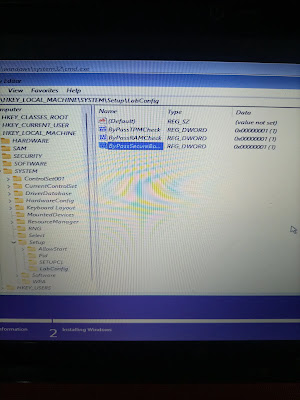
On the space that appear, type 'ByPassTPMCheck' and press 'Enter', then type '1' on the box that appear and press 'Enter', again. Repeat the above process, this time type 'ByPassRAMCheck', press 'Enter' and impute '1' and press 'Enter' again.
Repeat the above process once more, then type 'ByPassSecureBootCheck', press 'Enter' and then impute '1' and then press 'Enter' again until your screen appear as shown below:
When these processes are completed, press the 'ALT+TAB' keys from your keyboard simultaneously twice to save the configuration.
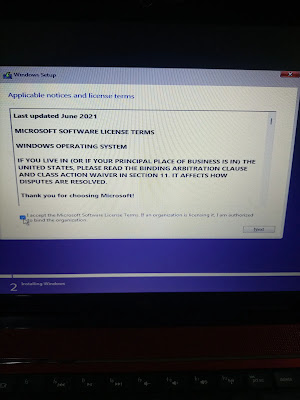
Then you will be taken back to the screen shown below, just tick the 'I accept' button and then click on the 'Next' button to proceed.
After that, choose 'Custom Installation' and proceed to where you will either delete the partitions of your hard drive or continue without deleting and click to the next step.
The next phase is where the installation files start loading on your system and your system will restart when completed. See the diagram below:
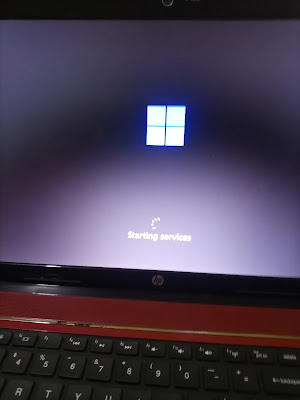
Once your system is restarted, the next screen you will see is this:
When you see the above screen, no action is required from you until the system restarts again and comes to the final configuration area as shown below.
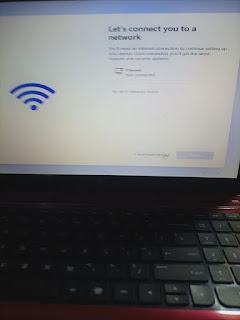
Input the necessary information accordingly as shown in the diagram above and allow your PC to restart and boot to the final stage as displayed below:
Once you see the the windows logo below, congratulations, you have successfully installed Windows 11 on your assumed unsupported PC.
Conclusion
Installing Windows 11 on a low configuration PC is just as simple and easy as explained above. So, with the above steps taken you don't need to purchase a new PC simply because you want to use the latest Windows OS. Try it today and enjoy all the nice features that's packaged with Windows 11.
Hope this help. Please share and do follow us on our social media handles to enjoy more insightful tips.
Thanks for reading.











0 Comments